Showing posts with label recipes. Show all posts

Wednesday, December 10, 2014

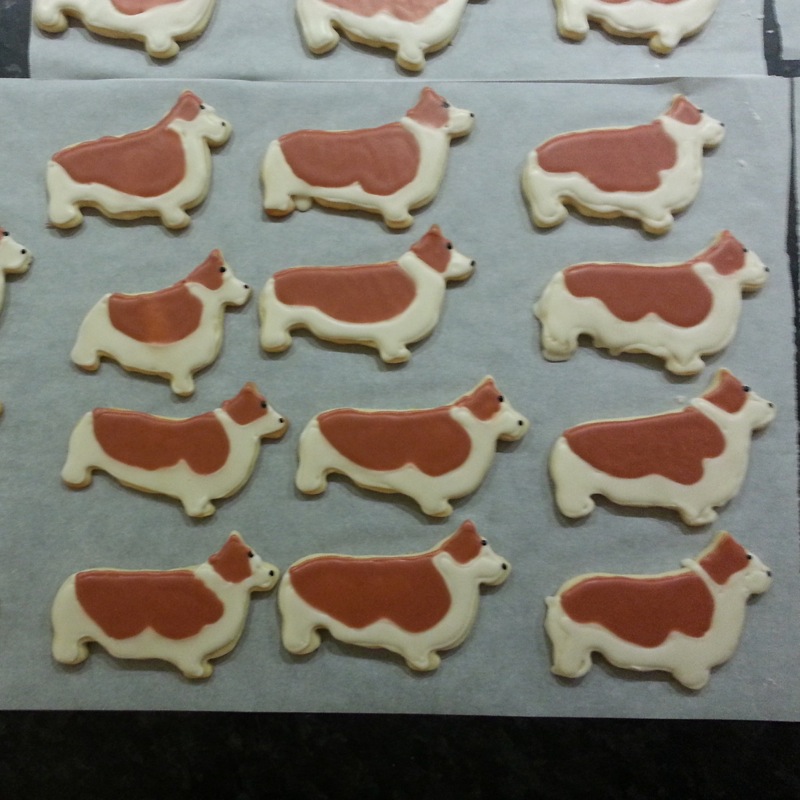
12.10 Christmas Corgis

Ta da!
Ok, I gotta admit, they are pretty cute. Not too shabby for the 1st time I've decorated cookies.

Well, I decorated them one other time before, but they looked like this:
I found the blog post from last time I made sugar cookies. Ok, most of them didn't turn out this bad, but I pretty much swore off making cookie cutter cookies after that.

Turns out this is a 4 day process, not 3 days. Because it takes a full 24 hours to let the icing dry. But that's ok, I don't have to do any labor on them anymore. And Jimmy can pass them out on Friday instead of tomorrow. Which works out better, because everyone is staying home tomorrow because of this crazy storm that's going to pummel the Bay Area. It's expected to be so bad that most schools are closed and a lot of employers are telling their people to work from home. A lot of parents have to work from home because their kids are staying home. It should be an interesting day.

Anyhoo, it took me 4 1/2 hours to decorate 47 cookies. And because sometimes I dig numbers, I spent a total of 9 hours, or 540 minutes on them over the last 3 days. Which is about 11 1/2 minutes per cookie. Which in truth and my reality, isn't too bad. Considering the amount of time I put into crafts. And more recently, on learning how to play the guitar.

And the surprising thing, at least to me, is that I would totally do it again. I so did not hate the process like I expected I would.

Recipes are just below my...

Christmas Tree of The Day!!

Once again I was walking home and hadn't spotted a suitable tree for today. But I remembered that most of the hotels have really nice ones in their lobby. I was surprised that the Marriott had relatively basic trees, but they had a lot of them. They also had a gingerbread house contest in their lobby.

Added bonus!

And now the recipes...

Cut Out Sugar Cookies
from The Kitchn
2 to 3 dozen cookies, depending on size (I doubled the recipe)

1 cup unsalted butter, softened at room temperature for 1 hour
2 ounces cream cheese, at room temperature
1 cup sugar
1 large egg
1 teaspoon pure vanilla extract
1/2 teaspoon almond extract
1 teaspoon lemon zest
3 cups flour
1 1/2 teaspoons baking powder
1/2 teaspoon salt

In the bowl of a stand mixer (or in a large bowl, using a hand mixer), cream the butter and cream cheese with the sugar. Beat for several minutes, or until light and fluffy. Beat in the egg, vanilla and almond extracts, and lemon zest.

Mix the flour, baking powder, and salt in a separate bowl then gradually add to the butter and sugar mixture until fully incorporated and a soft dough is formed.

At this point the dough can, and should be, chilled or frozen. If making cookies in the near future, divide the dough into 2 balls and roll each out to 1/4 to 1/8-inch thickness between large pieces of parchment paper. Refrigerate for at least 1 hour. Or freeze the dough balls, wrapped in plastic wrap and a freezer bag, for up to 1 month. To thaw, leave in the refrigerator overnight then proceed with the recipe.

To bake the cookies, preheat the oven to 350°F and prepare baking sheets by lining them with parchment or a Silpat. Cut cookies out of the rolled dough and place on the prepared baking sheets.

Bake cookies for 8 to 12 minutes, depending on thickness. Let cool for 5 minutes on the cookie sheet, then remove to a wire rack.

Cool completely before icing or decorating, and store in a tightly covered container.


How to Decorate Cookies with Icing
also from The Kitchn
These are FANTASTIC detailed tips. They are rock stars.

What You Need
Ingredients

1 batch sugar cookies, gingerbread cookies, or other cut-out cookies for icing

For the border icing:
1 cup powdered sugar
1/2 teaspoon vanilla or other flavoring extract
2 to 2 1/2 tablespoons milk or water
Food coloring, optional

For the flood icing:
1 cup powdered sugar
1/2 teaspoon vanilla or other flavoring extract
2 1/2 – 3 tablespoons milk or water
Food coloring, optional

Equipment
Small mixing bowls
Mixing utensils
Squeeze bottles – 1 for the border icing and 1 for each color of flood icing
Small funnel
Parchment paper

Instructions
1. Clear some counterspace: Iced cookies need at least 24 hours to dry, so clear a good amount of counterspace or tablespace where you can ice the cookies and leave them undisturbed. Cover the counter with parchment paper.
2. Arrange cookies for icing: Allow fresh-baked cookies to cool completely, then arrange all your cookies over the parchment paper. You might find it helpful to leave a small workspace clear in front of you where you can move each cookie as you’re working on it.
3. Prepare the border icing: Mix together the powdered sugar, vanilla, and 2 tablespoons of milk or water for the border icing using a spoon or a fork. It should be quite thick, and if you drizzle a little from your spoon, the ribbon should hold for a few second before melting back into the icing. This border icing should be just thick enough to pour easily. If desired, add food coloring to this border icing now.
4. Transfer the border icing to a squeeze bottle: Insert the funnel in the mouth of one of the squeeze bottles. Spoon some of the border icing into the funnel and let it drip into the bottle. Since this icing is so thick, it can be difficult to get it to drop into the bottle — you can squeeze the bottle to suction the icing and start it flowing. If it still won’t start flowing, add more milk or water one teaspoon at a time until just barely thin enough to pour (be careful of adding too much or else the border icing will pool instead of maintaining a border). Once flowing, it can still take a few minutes for all the icing to funnel into the bottle. Prepare your flood icing while you wait.
5. Prepare flood icing: Mix together the powdered sugar, vanilla and 2 1/2 tablespoons of milk or water for the flood icing using a fork or a spoon. This icing should still be fairly thick, but it should drizzle easily and a bit of drizzled icing should sink immediately back into the icing. If desired add food coloring to the flood icing now.
6. Transfer the flood icing to a squeeze bottle: Clean your funnel and insert it into a clean squeeze bottle. Pour the border icing into the bottle; this icing should be thin enough to funnel easily into the bottle. If necessary, add milk or water 1 tablespoon at a time until a thin, pourable consistency is reached.
7. Prepare as many batches of flood icing as needed to decorate your cookies.
8. Draw the borders around the cookies with border icing: Begin with the border icing and trace the outline of each cookie with icing. Hold the bottle vertical with the tip of the bottle slightly above the cookie. Squeeze gently and with consistent pressure so the border is the same width all the way around. Think of this border icing like drawing lines with a pen. If desired, you can draw inside the cookie — thicker lines are better than thin lines for separating areas of flooded icing.
9. Allow border icing to dry slightly: The border icing doesn't need to be completely dry, but the next step (flooding the cookies with icing) works better if the borders are at least dry to the touch. If you draw the borders on all your cookies before moving onto flooding, the first cookies will be dry enough to start flooding once you finish drawing the borders.
10. Flood the interior of the cookie with flood icing: Using a bottle of the flood icing, begin filling the interior of the cookie with icing. Use the nose of the bottle to push the icing into the corners and against edges. Think of this flood icing like using a paintbrush.
11. Allow the cookies to dry: Leave the cookies undisturbed for at least 24 hours to fully dry. Depending on the thickness of your icing and the layers on the cookie, it may take longer. When the cookies are dry, the surface of the cookies will be completely smooth, dry, and resistant to nicks or smudges.
12. Store the dried cookies: Once dry, you can stack the cookies between sheets of parchment paper in an airtight container at room temperature for several weeks.

please visit their site to see all their detailed step by step images. I even bought the squeeze bottles they recommended.

Sunday, January 05, 2014

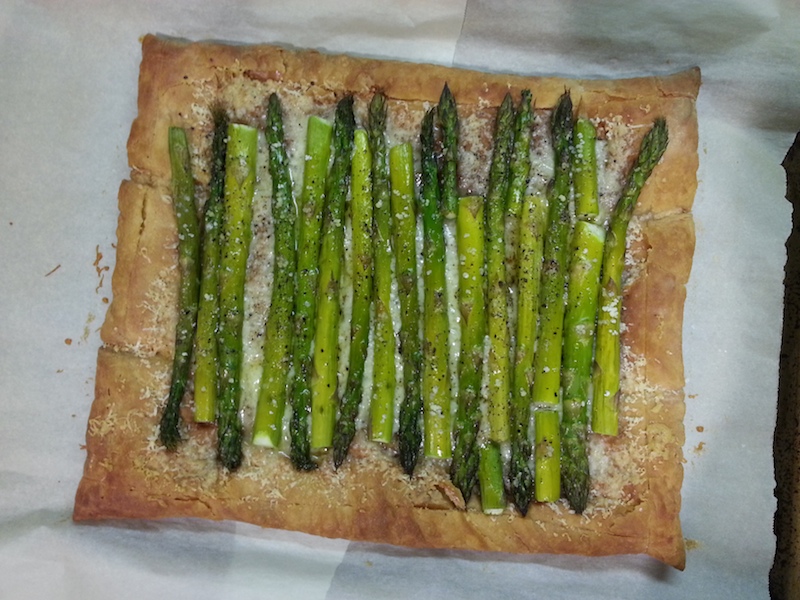
Asparagus Gruyere Tart

About 10 months ago, I pinned this recipe to my Pinterest board. It looked yummy so I decided to make it for New Year's Eve.
It was delicious! I'll definitely make this again sometime. One thing I'll do differently though, is add a little less salt. The cheese is already salty, so the asparagus doesn't need much salt added to it.

Asparagus Gruyere Tart
Ingredients:
Flour, for work surface
1 sheet frozen puff pastry
5 1/2 ounces (2 cups) Gruyere cheese, shredded
1 1/2 pounds medium or thick asparagus
1 tablespoon olive oil
Salt and pepper

DIRECTIONS

STEP 1
Preheat oven to 400 degrees. On a floured surface, roll the puff pastry into a 16-by-10-inch rectangle. Trim uneven edges. Place pastry on a baking sheet lined with parchment. With a sharp knife, lightly score pastry dough 1 inch in from the edges to mark a rectangle. Using a fork, pierce dough inside the markings at 1/2-inch intervals. Bake until golden, about 15 minutes.
STEP 2
Remove pastry shell from oven, and sprinkle with Gruyere. Trim the bottoms of the asparagus spears to fit crosswise inside the tart shell; arrange in a single layer over Gruyere, alternating ends and tips. Brush with oil, and season with salt and pepper. Bake until spears are tender, 20 to 25 minutes.

NOTE: Thaw puff pastry according to package instructions.
Emmentaler or Fontina cheese can be substituted for the Gruyere.
After the 1st bake, let the puff pastry cool a little, that'll allow it to fall if it has puffed up. I gently helped it down by pushing on the top of the tart oh so very carefully, so as not to break the tart. But I mostly let it fall by itself. It may not have puffed as much if I had made my folk piercings deeper.
I didn't bother trimming uneven edges. It seemed even enough to me after rolling it out.

Sunday, November 03, 2013

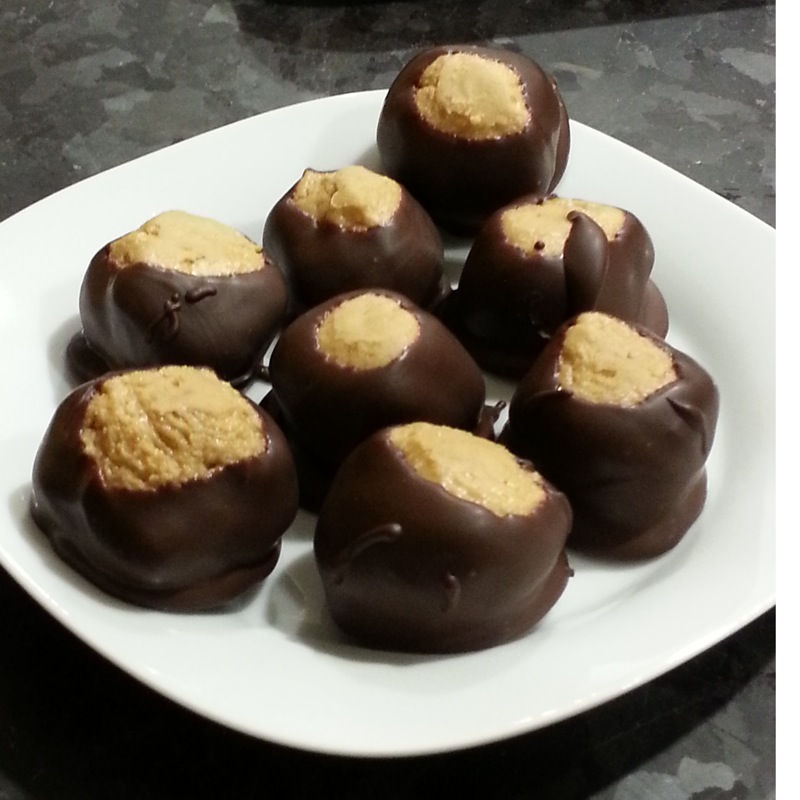
11.3 Buckeyes

This summer I bought peanut butter from Costco for Camp Retz, expecting to use a lot of it for all the kid's sandwiches. But you know Costco sizes. Even making almost 10 PB&J sandwiches a day didn't dent what I bought and I still had a lot left over.

I have a love/hate relationship with peanut butter. I'm currently not a big fan of it, but thankfully the husband loves peanut butter. So I scoured Pinterest for recipes to use up that peanut butter. I decided to try this recipe for "Buckeyes". I have to admit, it's pretty good. But mixing and smelling all that peanut butter didn't make me like it more. So I probably won't eat more than 1 or 2. Unfortunately, Ninja Nephew is allergic to peanuts, so I can't unload some of them to their family. I'm getting together with some of my crafting friends tomorrow night, so I'll pass some on to them. But I'll dole the rest of them out slowly to Jimmy.

Buckeyes

Ingredients:
1 1/2 cups Creamy Peanut Butter
1/2 cup butter, softened
1 teaspoon vanilla extract
1/2 teaspoon salt
3 -4 cups powdered sugar
2 cups semi-sweet chocolate chips
2 tablespoons Shortening

Directions:

1. COMBINE peanut butter, butter, vanilla and salt in large bowl. Beat with an electric mixer on LOW until blended. Add 2 cups powdered sugar, beating until blended. Beat in additional powdered sugar until mixture, when shaped into a ball, will stay on a toothpick. Shape into 1-inch balls. Refrigerate.

2. PLACE chocolate chips and shortening in microwave-safe bowl. Microwave on MEDIUM for 30 seconds. Stir. Repeat until mixture is smooth. Reheat as needed while coating peanut butter balls.

3. INSERT toothpick in peanut butter ball. Dip 3/4 of ball into chocolate, leaving top uncovered to resemble a buckeye. Remove excess. Place on wax paper-lined tray. Remove toothpick. Smooth over holes. Refrigerate until firm.

Original recipe here.

Wednesday, October 09, 2013

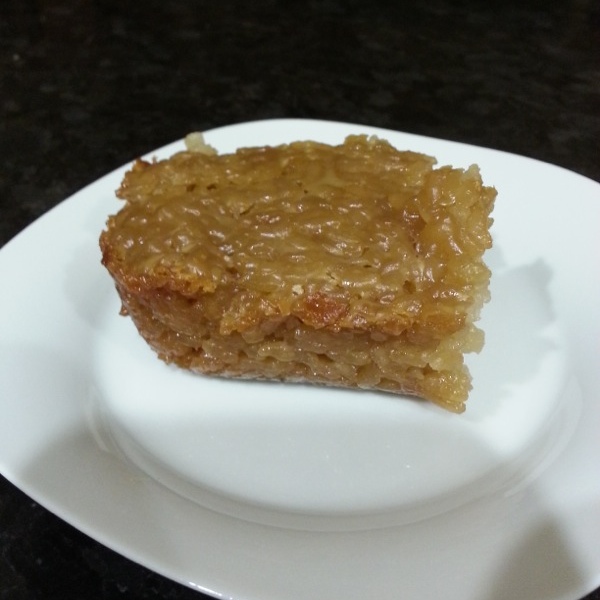
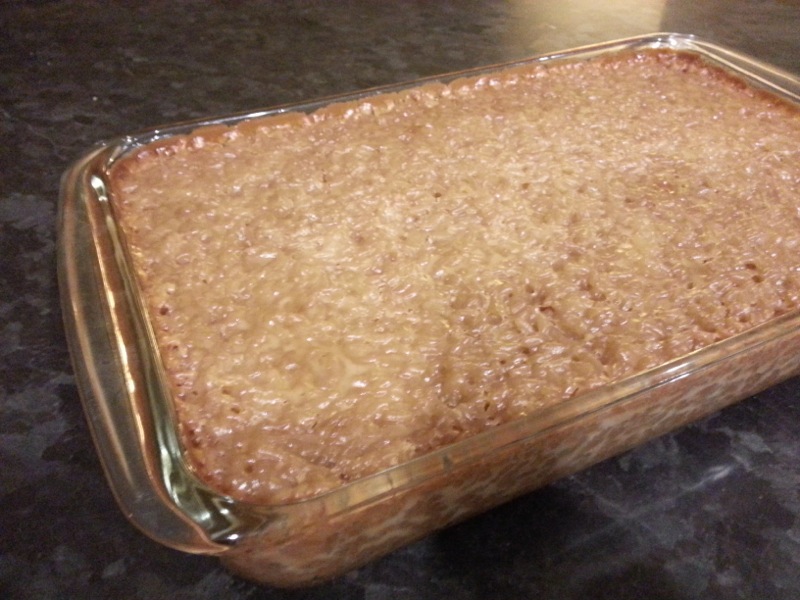
Biko? or Kakanin?


I've been thinking about this filipino dessert for months now. 1st off, I couldn't remember what it was called. So I had trouble finding a recipe online for it, and I couldn't find it in my mom's treasure trove of recipes. But i did a google search for filipino sticky coconut rice dessert and "Biko" came up. I was pretty sure that wasn't what my mom called it, but all the google images looked like it was the right thing. Anyhoo, I finally found one of her recipes but it wasn't called biko. Maybe because her dialect was Ilicano and she called it something else.

Well, apparently I made her recipe in 2005. I write notes on the margins of successes/failures, etc. When I made it, the rice wasn't cooked enough...al dente as I noted it. Her recipe didn't say anything about cooking the rice before baking it. All of the online recipes say to cook the rice before baking it, so that's what I did this time, and I also used this recipe as another guide.

I hate to say this, but it was a disappointment. Something wasn't right. I think it was the rice. Where do you find "Sweet Rice"? Online said it was the same as "glutenous rice", so I used what I thought was glutenous rice, the rice I had was labeled 'sushi rice' but it wasn't right. And it wasn't sticky enough, either. Maybe because it said to rinse it and that removed the gluten? And it also tasted like it could have used just a pinch of salt. I might try making it again in another 8 years. But there will never been a substitute for my mom's cooking.

Any tips or tricks or hints would be appreciated.


Kakanin
(I always thought it was pronounced Kan-kah-nun. lol)
Ingredients:
2 cans coconut milk
1/2 cup water
2 cups sweet or glutenous rice (don't use sushi rice, that's what I used!)
1 1/2 cups brown sugar (it could have been sweeter. but maybe if I used sweet rice, it would have been.)
1 tsp. vanilla

Directions:
Preheat oven to 350F.

In a large pot, bring coconut milk and water to a simmer. Add rice and continue simmering till rice is fully cooked, about 15-20 minutes, stirring continuously so rice doesn't burn. Rice should resemble risotto. Remove from heat. Stir in brown sugar. Pour into a buttered 9x9 baking pan and smooth top evenly. Cover with aluminum foil, bake for 45 minutes. Remove foil and bake an additional 30-45 minutes. Cool slightly before serving.


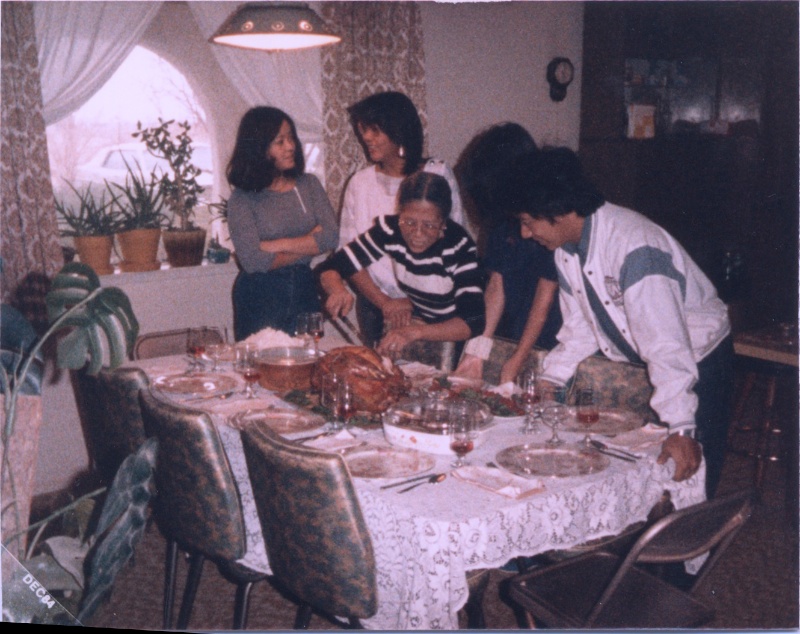
My mom in the center of the action, carving the turkey. 1984.

Thursday, May 30, 2013

Mom's Macaroni Salad

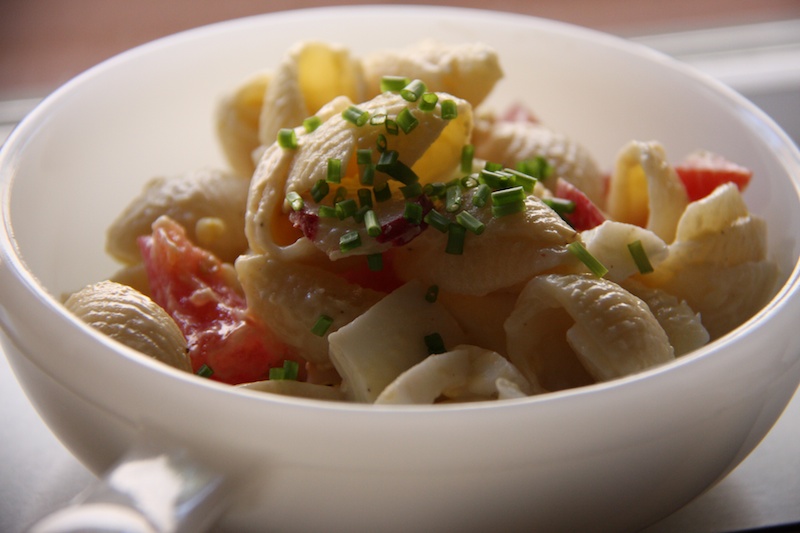
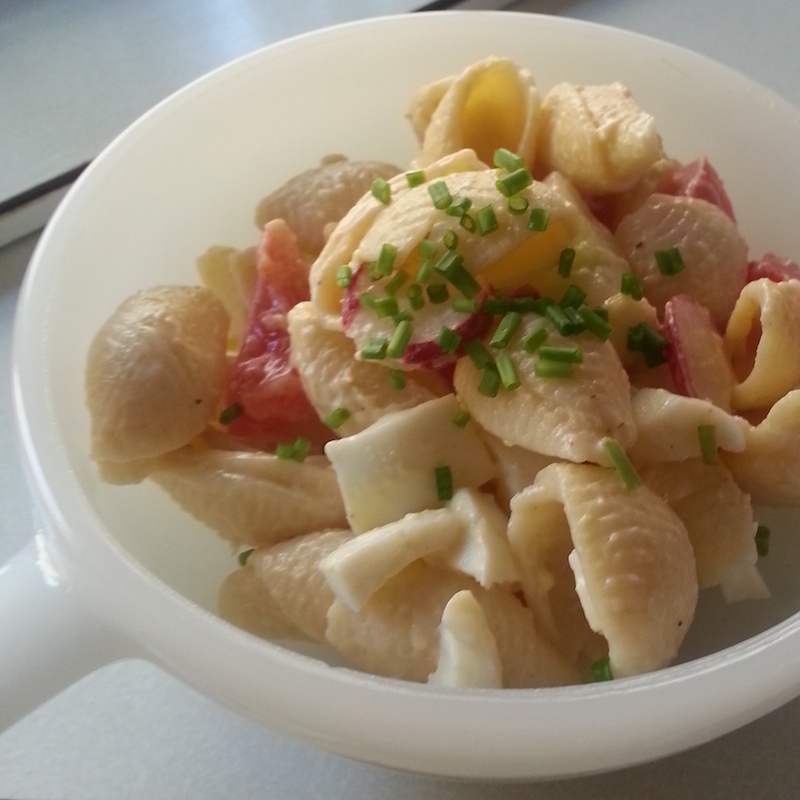
Since we were planning on having a couple of friends visit during our 8-9 days at the hideaway, I made a perfect BBQ/summer salad...Macaroni Salad.

It's my mother-in-law's recipe and I usually make it once a year, always in the summer, always when there are several people to enjoy it.

Basic ingredients. Shell pasta, cucumbers, tomatoes, radishes, hardboiled eggs, miracle whip (never mayonaise), salt and pepper. Oh ya, onion...but we never put onion because we don't like raw onion. So instead, serve some chopped chives on the side for people to add as they'd like. I can handle chives, just not raw onions. Jimmy doesn't even like chives.

Mix everything together then let the flavors meld in the fridge for at least 3 hours.

Not exactly the most calorie friendly side salad, but what 'mayonaise' based salad ever is? You could use light miracle whip (or mayo if you have to), we've used the light stuff with success. You could also use less miracle whip or mayo.

Here's my mother-in-law's recipe without any of my adjustments:

Mom's Macaroni Salad

2 packages American Beauty Tri Pasta (shells)
1 lg. hot house cucumber, sliced ¼” thick
whole bunch radishes, sliced
bunch green onions, sliced, include 1 inch of greens
6 hard boiled eggs, chopped real fine
4 tomatoes, cut
sm. Bottle miracle whip
salt and pepper

Cook pasta as directed on package. Mix all ingredients. Refrigerate several hours before serving.

Wednesday, April 10, 2013

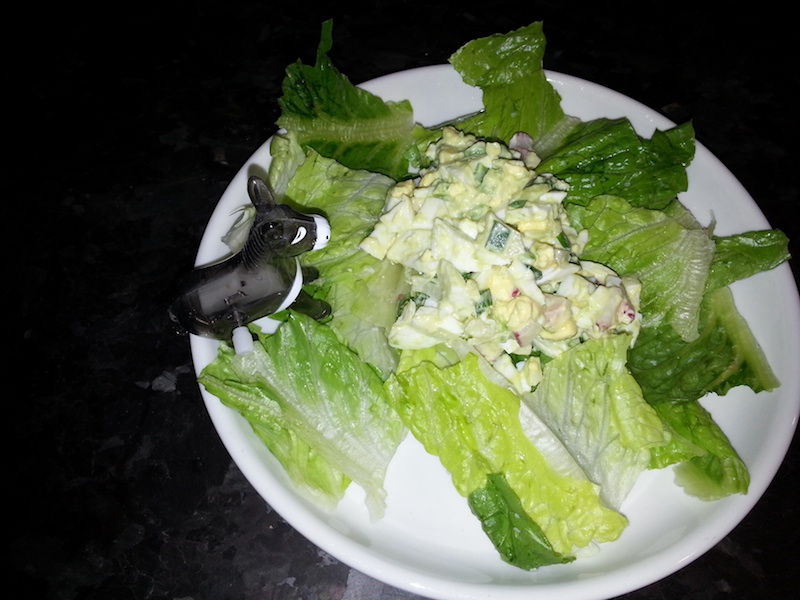
Radish Avacado Fennel Egg Salad

One of my girlfriends is trying to eat Paleo.

If you're not familiar with the paleo diet, here's a quick blurb from wiki:
The paleolithic diet (abbreviated paleo diet or paleodiet), also popularly referred to as the caveman diet, Stone Age diet and hunter-gatherer diet, is a modern nutritional plan based on the presumed ancient diet of wild plants and animals that various hominid species habitually consumed during the Paleolithic era—a period of about 2.5 million years which ended around 10,000 years ago with the development of agriculture and grain-based diets. In common usage, such terms as the "Paleolithic diet" also refer to the actual ancestral human diet.

I know I'd never be able to adhere to such a diet, though I do agree that everyone needs to eliminate processed foods as much as possible.

Anyhoo...this was one of her recipes. She doesn't use mayo. I added a little bit but it definitely would have been good without it.


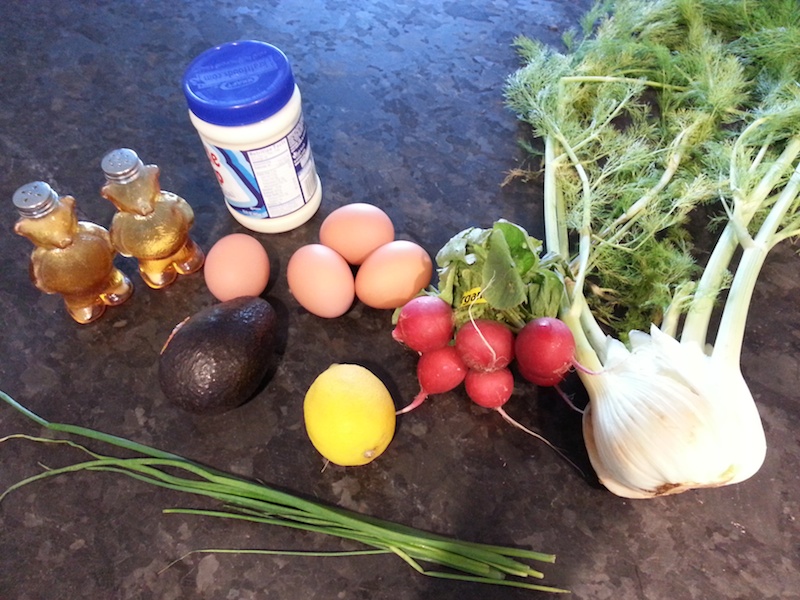
Ingredients:
4 hard boiled eggs, cooled and chopped
1 avocado, diced
1/4 cup fennel bulb, julienned into 1/2 inch matchsticks
1/4 cup radish, finely diced
1/4 cup chives, finely chopped
1 tsp. lemon juice
salt and pepper to taste
a heaping tablespoon of mayo or greek yogurt if you want a smoother texture

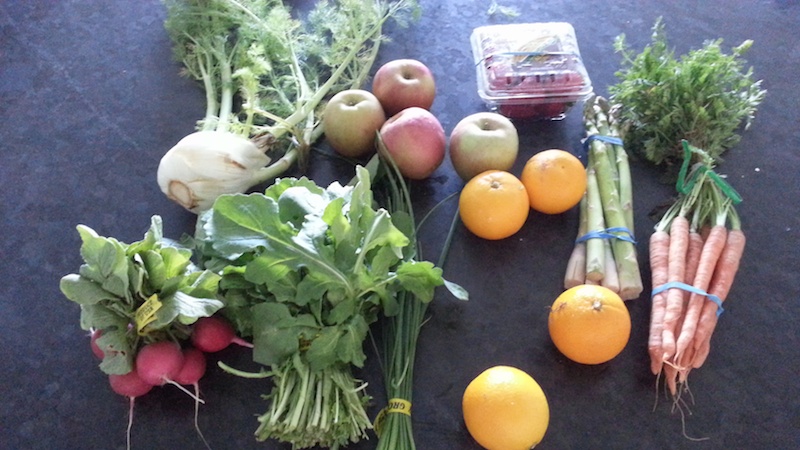
Coincidentally, I had received most of the ingredients needed in my Farm Fresh to You Box the day before.


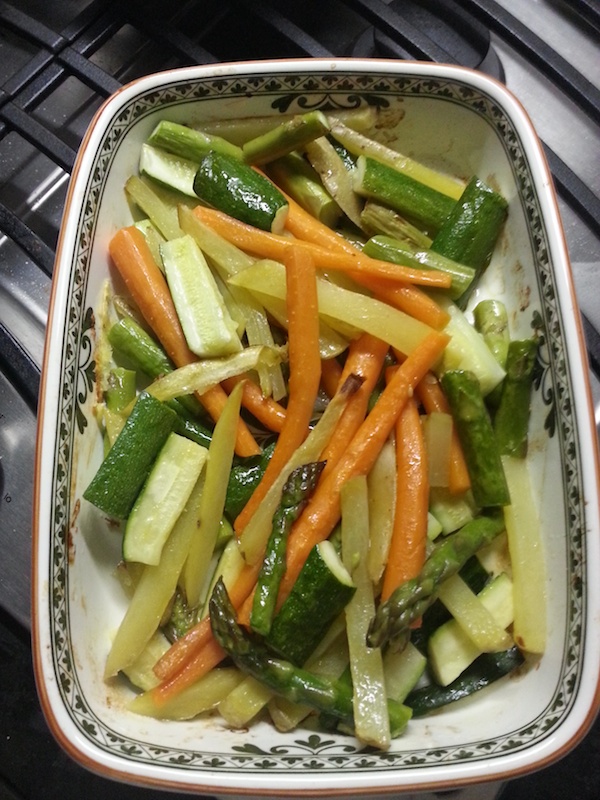
I also made some roasted veggies, simply tossed with a bit of olive oil and kosher salt.
I used the carrots, leftover fennel and asparagus from my box and included some zucchini and yukon gold potatoes.

Monday, November 19, 2012

11.19 - Sugar Coma

I'm not entirely sure a sugar coma is something to be grateful for...but I do enjoy the process of making stuff. With an added bonus of a couple of tastes and nibbles along the way, too.

Last month I took a workshop on making artisan caramels. During the workshop, we watched the teacher/baker how to make them, but didn't actually get any hands on experience aside from the final step of wrapping the caramels in parchment. So with the holidays right around the corner, I decided to put what I learned into actual use.
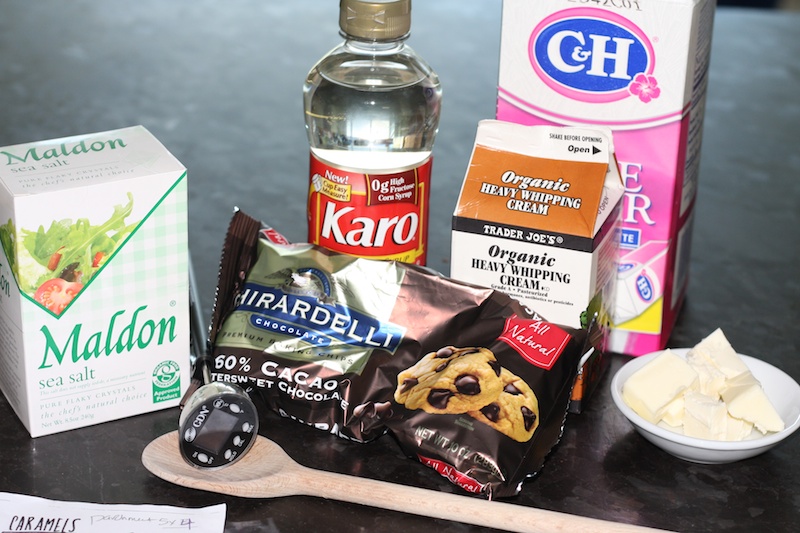
I'm not sure what makes them artisan because the ingredients are basic. Maybe it's because of the Maldon salt and ghirardelli chocolate. But sugar? butter? corn syrup? heavy cream? nothing 'artisan' about that.

The 1st thing to do is get the cream to a boil over medium high heat.

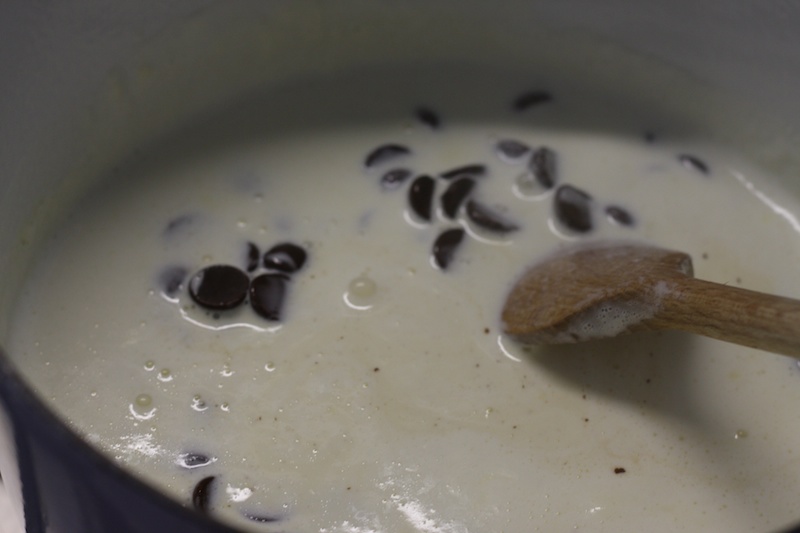
add the chocolate. Wait a minute before stirring...

then stir till completely melted. Voila! You have ganache! Remove from heat and set aside.

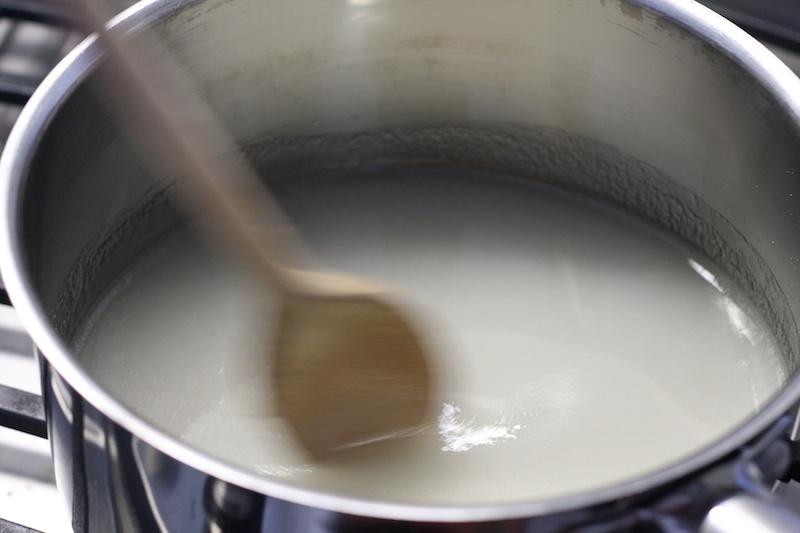
Bring the sugar, corn syrup, water and table salt to a boil. Stirring till sugar is dissolved.

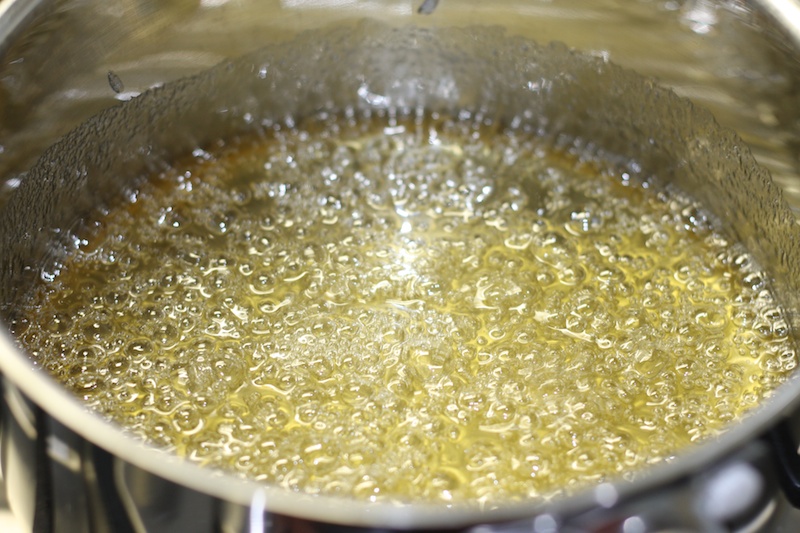
When syrup turns clear, keep at a rolling boil at medium high heat, but stop stirring. You can gently swirl the pan around occasionally.

In about 10 minutes, the syrup will become a deep golden color. In this photo, it's not quite there yet. Almost though.

Then carefully pour in the chocolate ganache mixture. Watch out! It'll bubble and steam. Continue to boil over moderate heat. Now stir stir stir. Don't stop stirring. Unless you need a break to take a photo every now and then.

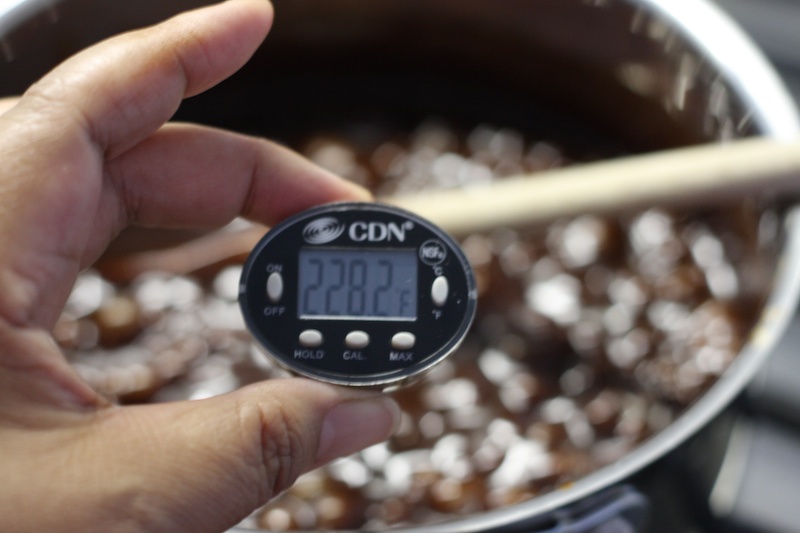
Ok, you can stop stirring to get a temperature reading every few minutes. But you need to keep stirring till the temperature reaches 255*F. A thermometer is critical in candy making. If it gets hotter than 255*, your caramel will be a little chewier and harder. If it's lower than 255*, then it won't be as chewy and could be a little floppy. But as long as you keep it within 5 degrees in either direction, you should still be ok. It takes a good 15 minutes or more to get the caramel up to 255*.

After it's reached temperature, add the butter and sea salt and mix till everything is combined. Or you could wait to sprinkle the sea salt on top of the caramel after you've poured it into the prepared pan.
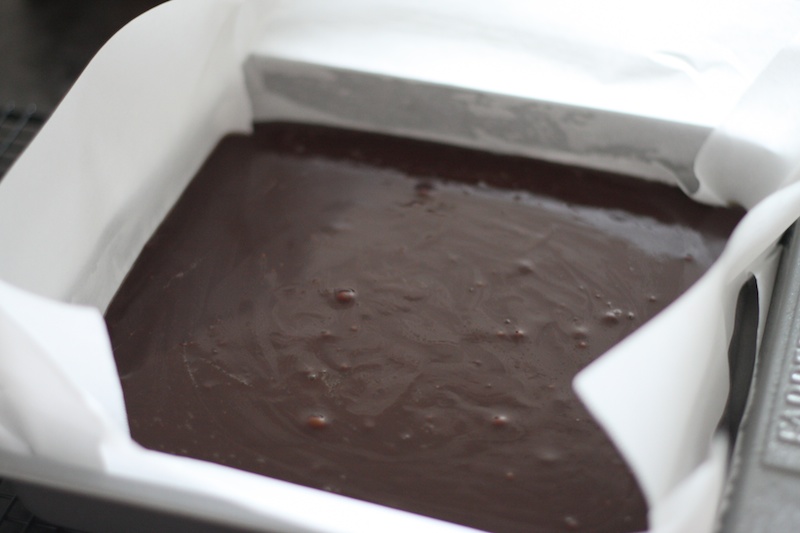
Line an 8"x8" pan w/ 2 sheets of crisscrossed parchment. Carefully pour the caramel into pan. This is when you can sprinkle the sea salt on top if you didn't mix it with the butter in the previous step.

Let it cool completely before cutting, at least 2 hours.

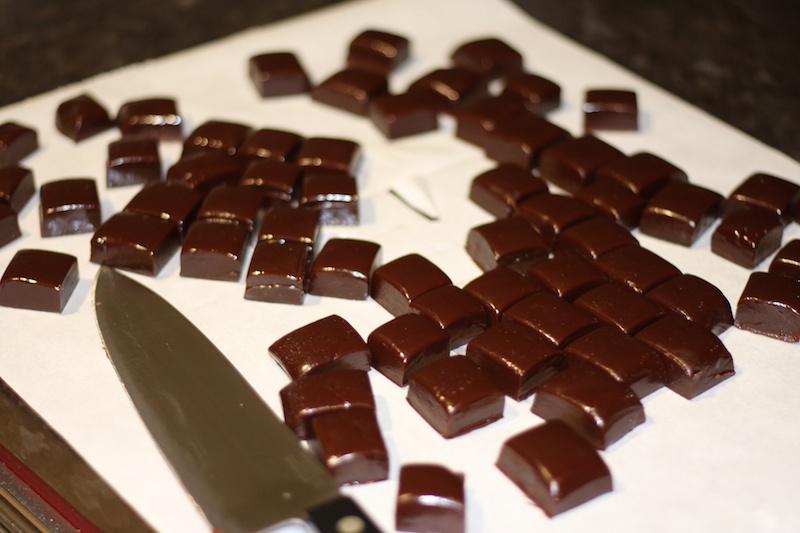
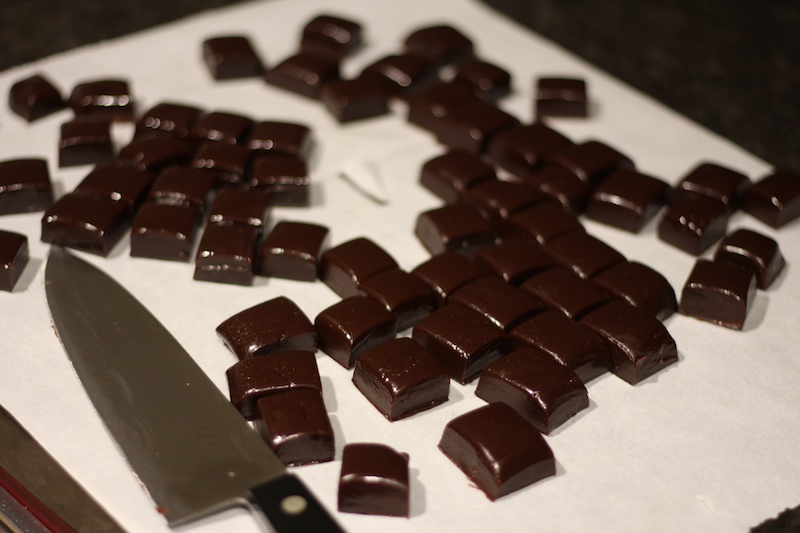
Using a ruler and a sharp knife sprayed with vegetable or canola oil to prevent sticking, cut caramel into 1" squares.

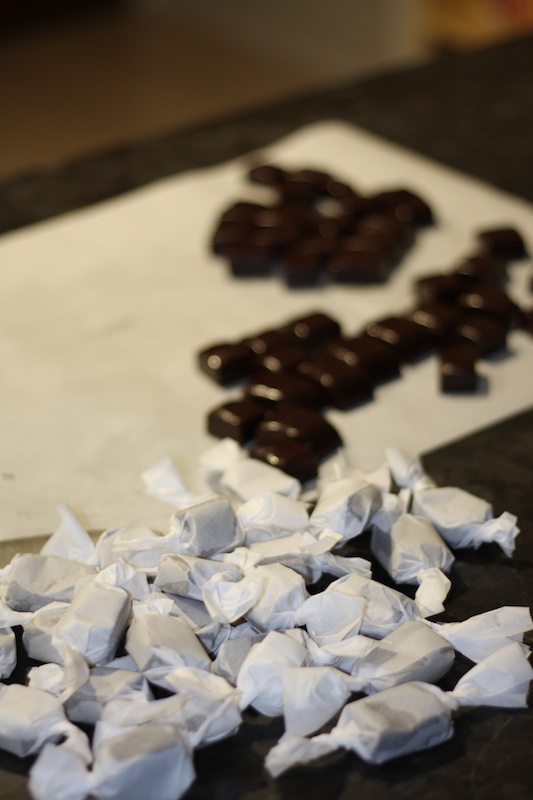
Wrap each caramel in a 4"x5" piece of parchment.

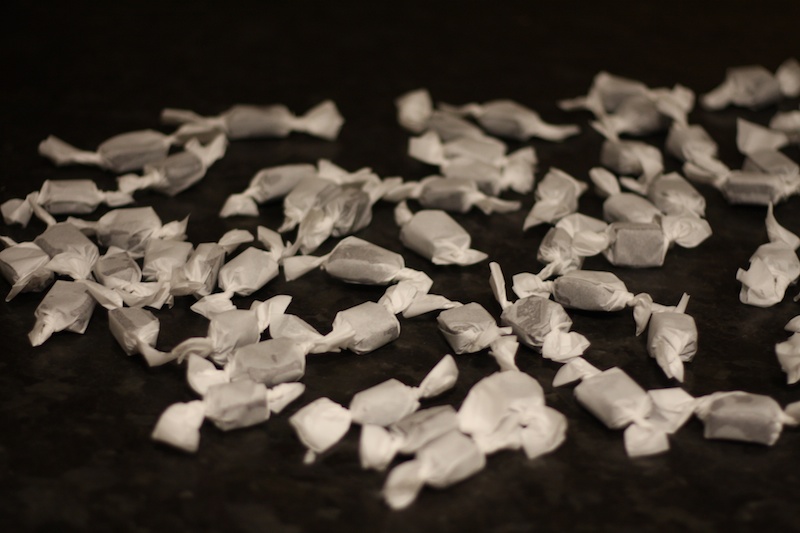
You'll have 64 pieces of caramel and extra to nibble on from evening out the edges.

Put a few into cellophane bags tied closed with pretty ribbon and share with your closest friends.

Salted Chocolate Caramels

Ingredients:
2 cups heavy cream
10 1/2 oz bittersweet chocolate (65-75%) chopped fine or in chip form
1 3/4 cups sugar
1/2 cup light corn syrup
1/4 cup water
1/4 teaspoon salt
3 tablespoons unsalted butter cut into tablespoon pieces
2 teaspoons flaky sea salt such as maldon

Vegetable oil for greasing
special equipment: parchment paper, candy thermometer, 8" square pan

Directions:
1. line bottom and sides of an 8" pan with 2 sheets of crisscrossed parchment or foil sprayed with veg oil.

2. make ganache:
-bring cream just to a boil in a big saucepan over moderately high heat,
-reduce heat to low
-add chocolate
-let stand for 1 minute then stir till chocolate is completely melted
-remove from heat and set aside

3. bring sugar, corn syrup, water and salt to boil in a heavy pot over moderate heat, stirring until sugar is dissolved. Boil without stirring but gently swirling pan occasionally, until sugar is deep golden, about 10 minutes. Tilt pan and carefully pour in chocolate mixture (mixture will bubble and steam). Continue to boil over moderate heat, stirring frequently, until mixture registers 255*F on thermometer, about 15 minutes. add butter, stirring until completely melted, then immediately pour into lined baking pan. (Sprinkle evenly with sea salt optional, or just mix into caramel). Cool completely in pan on a rack, about 2 hours.

4. Invert caramel onto a clean cutting board sprayed with oil to prevent sticking. peel off parchment. turn caramel salt side up. cut into 1" squares. makes 64 pieces.

Tips for success:
-make sure you're using a decent thermometer and it's calibrated.
-oil the foil otherwise the caramels wont come off
-dont walk away from your caramels once they're cooking (they'll burn!).
-use a ruler to measure the caramels so they look nice and neat
-use a good pot (le cruset)
-remove from heat @ 252*
-can freeze
- air is the enemy
-use a wooden spoon to stir
-cut parchment into 5x4" to wrap caramels after cut

Monday, April 30, 2012

4.30 Chicken Tamale Casserole

If I'm being a good little planner, I try to figure out what to make for dinner for the week so I can get my grocery list together. I've been better this year at menu planning, but still not consistent. While Jimmy can eat the same thing over and over again, I like more of a variety. But sometimes it's daunting searching the internet for a recipe that will satisfy both of us.

But I found a new recipe today that was delicious and will become a part of our regular rotation.
Chicken Tamale Casserole from Valarie's Kitchen. The photo is from her site, too. Her blog has detail step by step photos, so I recommend checking it out for more details.

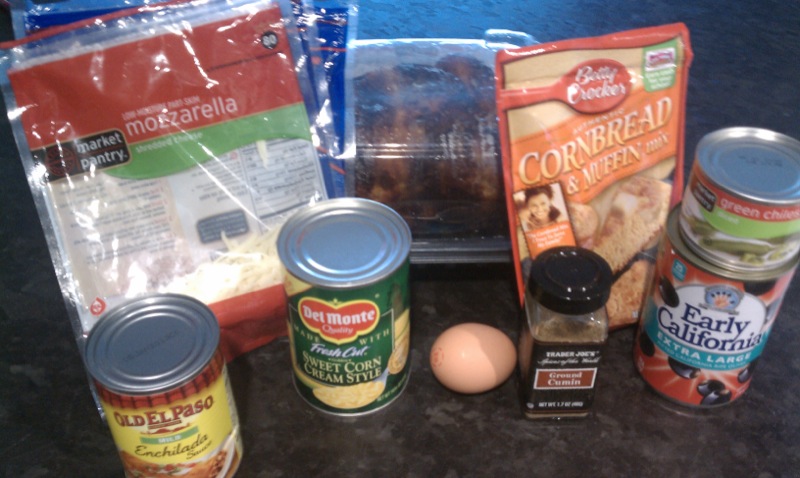
These are the ingredients I used, in addition to skim milk. I made a green salad to go with it. Yummy and super satisfying. So yummy i forgot to take a photo of the finished dish before shoveling it in.


Chicken Tamale Casserole
Serves: 6

Ingredients:

2 cups shredded cheddar/jack cheese blend, divided
1/3 cup lowfat milk
1 egg, lightly beaten
1 teaspoon cumin
1/2 teaspoon fresh ground pepper
1 (14 ounce) can cream style corn
1 (8.5 ounce) box corn bread mix
1 (4 ounce) can chopped green chiles, drained
3 cups cooked, shredded chicken
1 cup prepared red enchilada sauce
1 (4 ounce) can sliced olives
5 or 6 green onions, chopped
Directions:

Preheat oven to 400 degrees.

Spray a 13 x 9 pan with cooking spray. In a large bowl mix together 1/2 cup cheese, milk, egg, cumin, pepper, creamed corn, cornbread mix, and green chiles. Pour into prepared pan. Bake for 15 minutes or until set. Remove pan from oven and pierce surface liberally with a fork; pour enchilada sauce over top. Top with chicken, sprinkle with remaining cheese. Bake at 400 degrees for an additional 15 minutes or until cheese is melted and bubbly. Remove from oven and sprinkle with olives and green onions and return to the oven for an additional 3 or 4 minutes. Remove from oven and let stand for 5 to 10 minutes.

Cut into squares and serve with sour cream and tortilla chips on the side.

Monday, January 30, 2012

Chicken Tortilla Soup

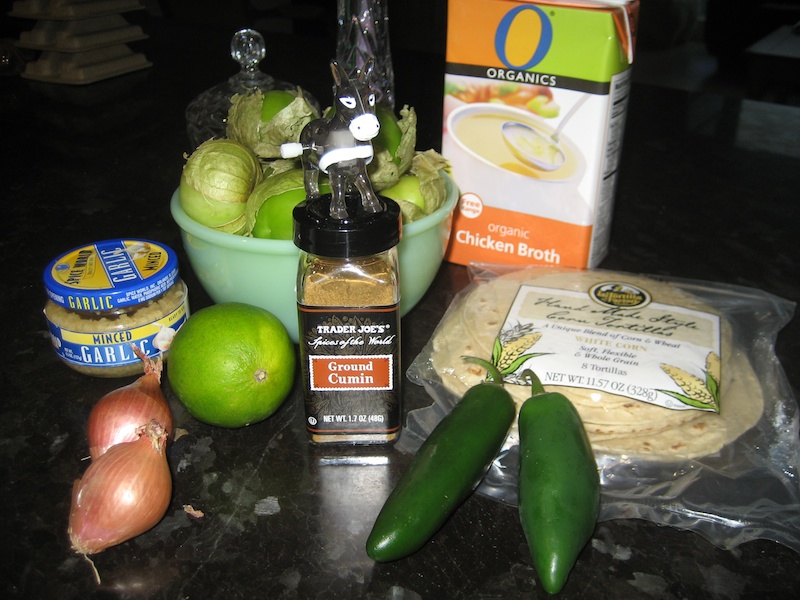
I want to try a few new recipes instead of just sticking to my old standbys. I pinned this recipe on Pinterest a couple of weeks ago and decided to try it tonight.
These were the ingredients.

My finished photo isn't pretty. I was hungry and I forgot to put the soup in a prettier bowl for a photo. But it was delicious! If you want a pretty photo, then you should really check out Sing For Your Supper's post.

Here's her recipe:
____
Chicken Tortilla Soup

6 cups chicken stock
2 cups cooked, shredded chicken (I like to roast or poach bone-in chicken breasts until tender, then shred the meat. Additionally, you could also use a store-bought rotisserie chicken)
half an onion, chopped
1 clove garlic, minced
2 small-medium zucchinis, chopped
1 teaspoon chili powder
1 teaspoon cumin
1/4 teaspoon chipotle chile powder
juice from 2 large limes
salt and pepper to taste

Coat a large saucepan with olive oil over medium-high heat, add onion and zucchini and sautee until tender, about 3 minutes. Add the garlic, chili powder, cumin, chipotle chile powder, salt and pepper and stir until fragrant. Pour in stock and bring to a boil. Add the shredded chicken, reduce the heat to medium and simmer until the chicken is heated through. Add the lime juice and taste for seasoning. Ladle into bowls and top with and desired garnishes. Serves 4.

Garnish ideas:

crushed tortilla chips
shredded Monterey Jack cheese
sliced avocado
fresh cilantro

____

Unless I'm baking, I pretty much just guesstimate my measurements so everything I added was approximately what she calls for. I had an extra 1/2 a lime left over from yesterday so I used 2.5 limes and a little extra garlic. It was deliciously limey! And we love cilantro so I put a big handful in each bowl.

I'll definitely make this again.

Tuesday, December 21, 2010

Holi-de-licious {December Daily 21}

4 more days and counting. Actually, it's 3 more days because you know everyone really starts celebrating on the 24th.

I've been busying myself with creating the yearly family calendar. This is a sneak peek of January's page.

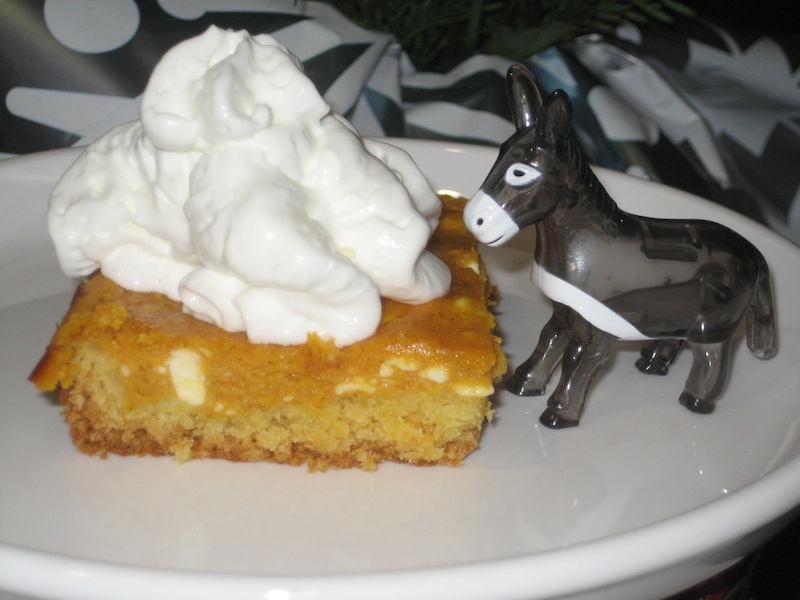
Of course I need nourishment whilst doing all this crafting so I decided to try a new recipe that my friend Kristina gave me. Here's her recipe on her blog.It's a Gooey Pumpkin Cake and it is wonderfully delicious and a perfect fall dessert. Sure, today may be Winter Solstice but who's gonna nitpick about cake?

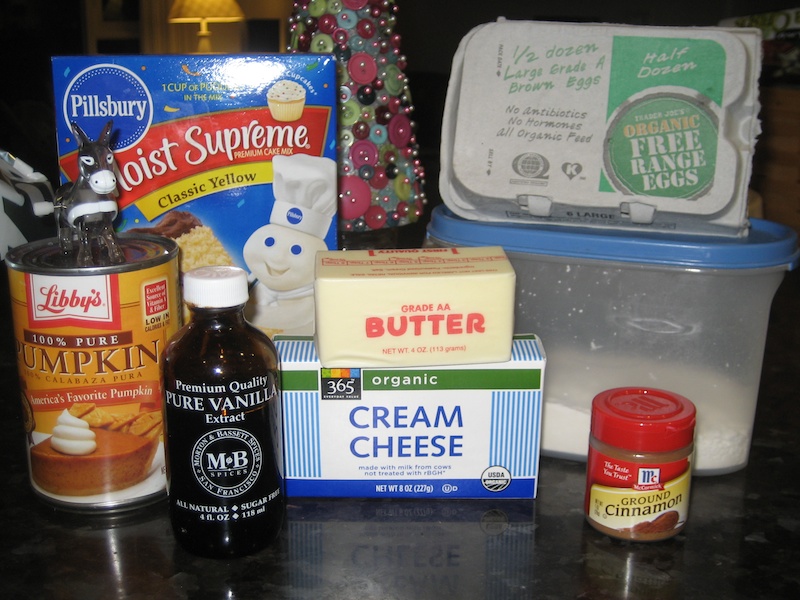
These are the ingredients.

I halved Kristina's recipe because there's only 2 of us. The full recipe makes a 9"x13" pan so I made mine in an 8"x8" pan.
Also, I should have blended the cream cheese with the pumpkin better than I did. In hindsight I should have used a mixer because my hand got too tired trying to mix it together. There's only so much a crafter's hands can do in a day. lol. But it was still fantastic! It's like a layer of yellow cake topped with a pumpkin cream cheese gooey goodness.

I have a personal theory that coffee is better in the afternoon than in the morning. When you need a little pickmeup during that afternoon drag, the savory sweet flavor of coffee with lots of milk and sweetener hits the spot. mmmm. a great accompaniment to a piece of Gooey Pumpkin Cake, too!!

Friday, November 19, 2010

11/19 Gratitude: Tangy deliciousness - Tomatillo Salsa Verde

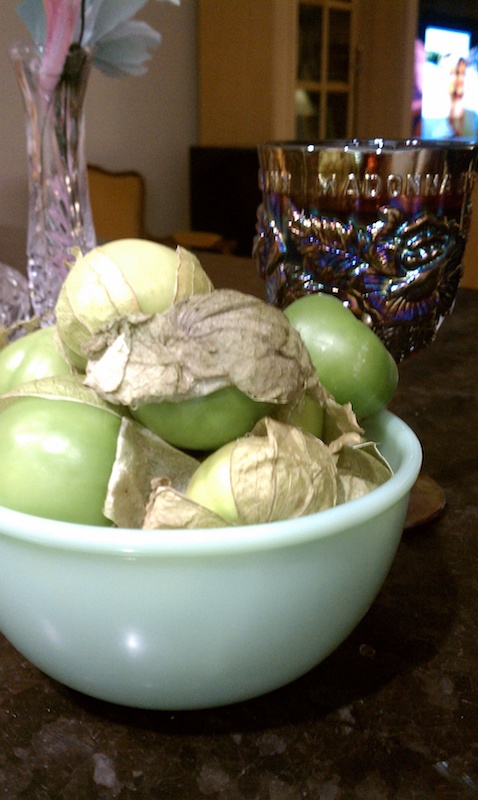
One of our favorite flavors at our favorite Mexican restaurant is their tomatillo sauce. And I've been curious to try to make some of my own, but whenever I see the tomatillos at the grocery store, i get a little scared. Well, I finally took the plunge and bought 1.5 pounds of tomatillos the other day with the intent to make my 1st batch of tomatillo salsa verde.

I checked my favorite recipe site, Allrecipes. There were a handful of recipes that had 4 1/2 stars. I used 2 of them as a jumping off platform. This one and this one.

So I bought my tomatillos, a couple of jalapeno peppers and some limes. Even though neither of those recipes call for limes. But there are 2 ingredients that La Morenita (the fav restaurant) uses in theirs that might be their secret ingredients: lime and chicken stock. Ok, not really secret because those are common ingredients. Especially lime in Mexican food. And they told us.

Both recipes said to husk the tomatillos but didn't tell me if i should cut them up before putting them in the pot. Thank God for youtube. I already had the whole tomatillos in the pot ready to cook, but that didn't feel right. So I watched this video and saw that she chopped the tomatillos. And she added lime, too! Ok, I was good to go.

I realized i forgot to buy garlic. Shoot. Oh well, the stuff in the jar and some garlic powder would have to do.
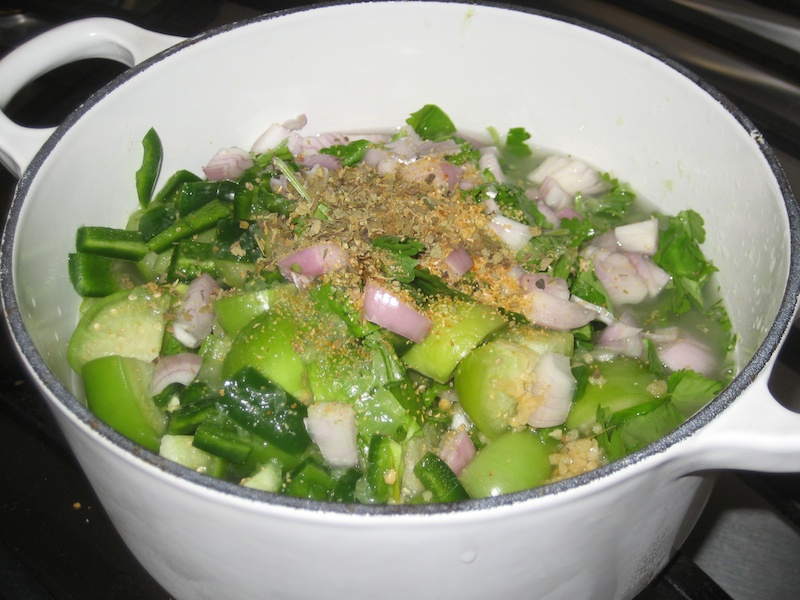
I put everything in the pot. added a bit of chicken stock instead of water.

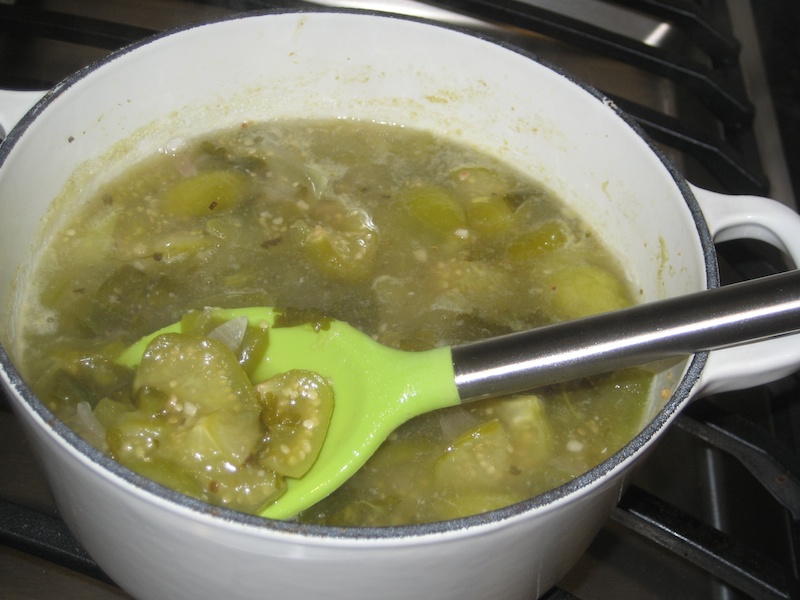
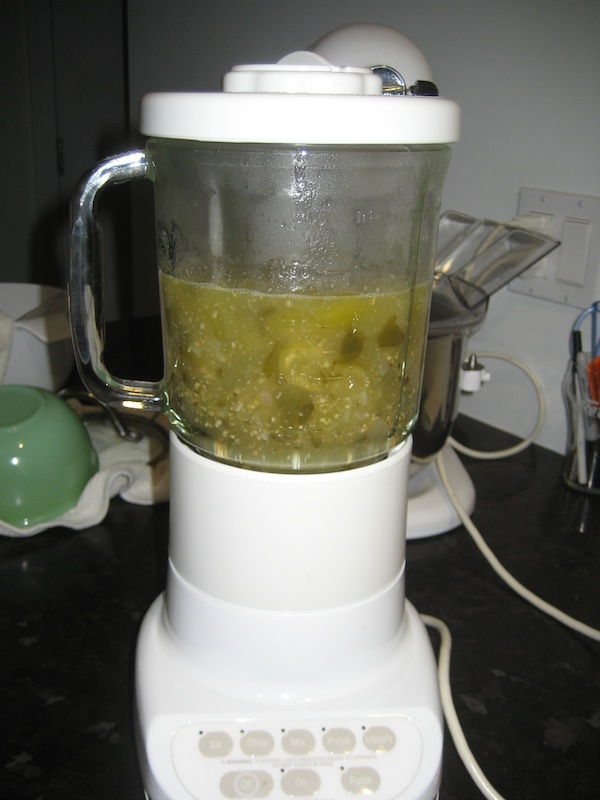
Brought to a boil then let simmer for 15 minutes.

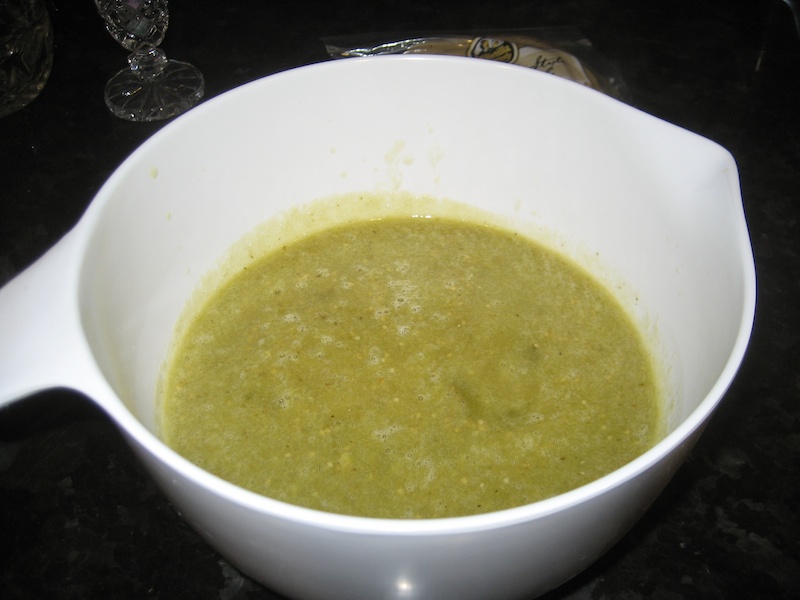
Put it in the blender to puree. It got a little crazy and hot salsa verde spurted out the top! Thankfully, not on the walls or ceiling! But major cleanup required on the counter and floors. Didn't document that with a photo because I was frantically cleaning it all up.

1st taste was tangy! Very tangy. Too tangy? It's good, but is the tang too overwhelming? hum...

So what am i gonna do with all this salsa verde now?

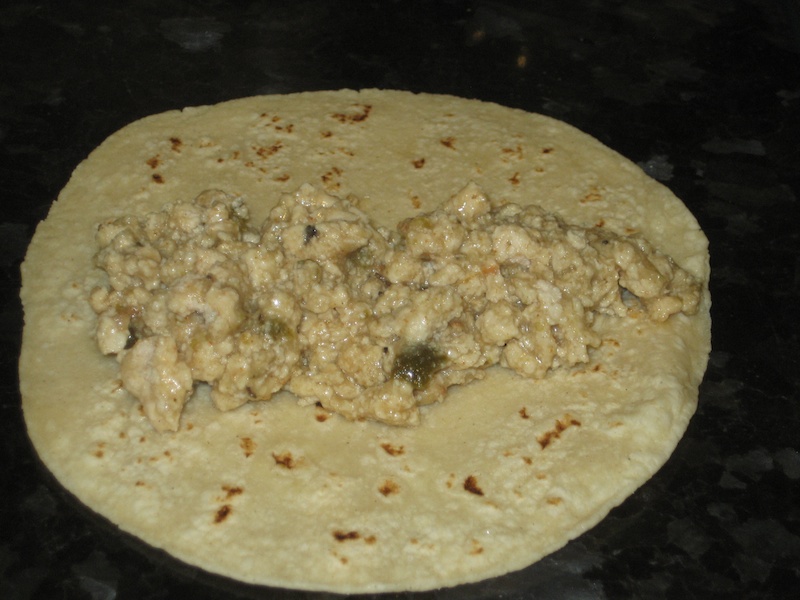
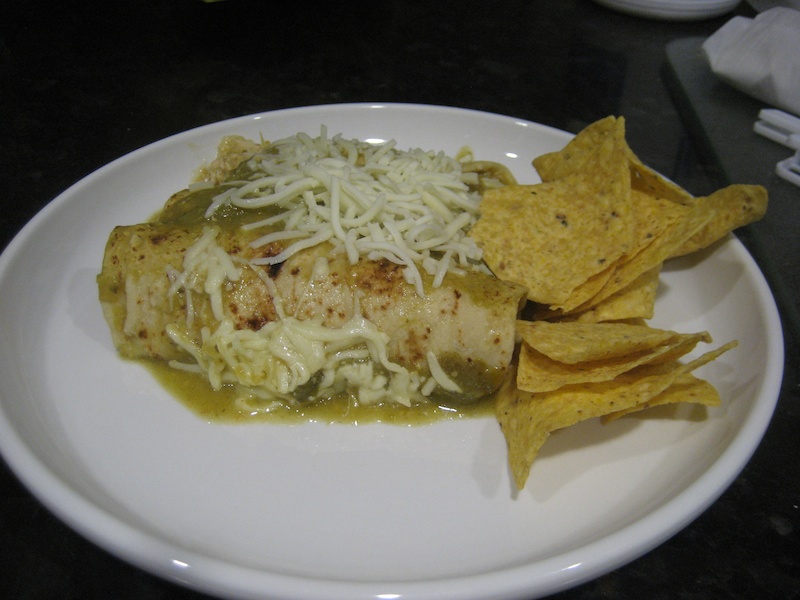
I had some leftover chicken chili and it seemed like a suitable filling for enchiladas.

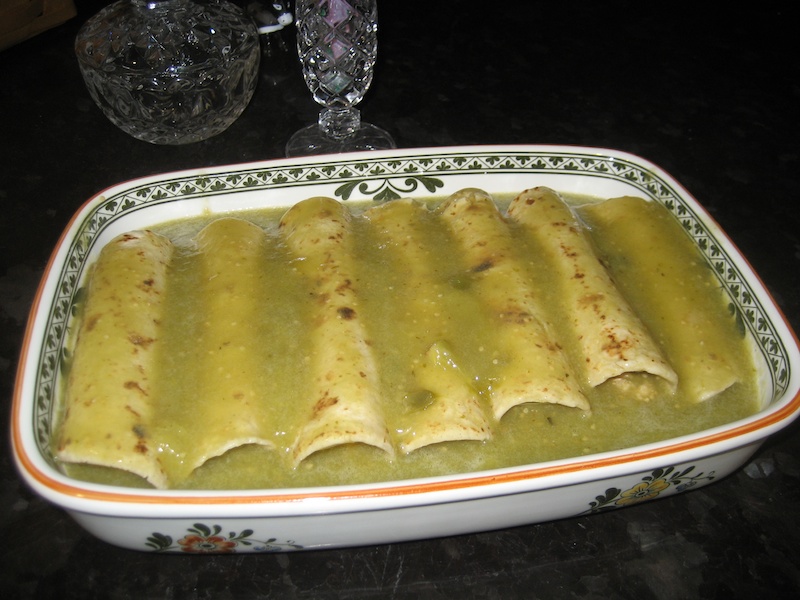
So I rolled up some up, flooded them with salsa verde and baked them in the oven at 350* for about 1/2 hour.

Ok, totally tooting my own horn, but these were fantastic!! Like, fan.tas.tic! Way better than I expected. I admit i was nervous. 1st when i started chopping the tomatillos. Raw tomatillos don't smell very good. Then when I had my 1st taste before i poured the sauce on the enchiladas. I was afraid it would be too tangy. But my best confirmation? Jimmy loved it too. Like, mopped up his plate loved it. Mopped it up clean like i could have gotten away with putting the plate back into the cupboard.

Tomatillo Sauce
Ingredients I chose to use:
1 1/2 pounds tomatillos, husked and chopped
2 scallions, chopped
2 jalapenos, seeded and chopped
2 (ish) cups of chicken stock
1/2(ish) teaspoon cumin
1/2(ish) teaspoon dried Mexican oregano
juice from 2 limes
1 heaping spoon of minced garlic from a jar
1/2(ish) teaspoon garlic powder
handful of cilantro, probably 1/2 cup or more
1tsp(ish) salt

Put everything in a stock pot or dutch oven and bring to a boil then simmer for 15 minutes.
Put everything in a blender (perhaps do it in batches) and puree for a minute or 2 till no chunks remain.
PS: totally nonfat if you use nofat chicken stock or water.

~~
I'll definitely make this again but what I might do differently:
-use fresh garlic
-use fresh oregano
-blend in batches instead of doing it all at once so as to avoid blender blowout
-use less salt when using chicken stock

a couple notes about the enchiladas:
I used homemade (but store bought) corn tortillas for the enchiladas. After I poured the salsa over the enchiladas, they sat for about an hour before I baked them because I waited till i knew that Jimmy was on his way home before I put them in the oven. So the sauce soaked into the tortillas. Also sprinkled them with cheese.

Thursday, October 21, 2010

Couscous Confetti Salad


I've been MIA for 2 weeks and I have lots to share but I'm addicted to something new (and healthy! shock!!) so I wanted to share it 1st.

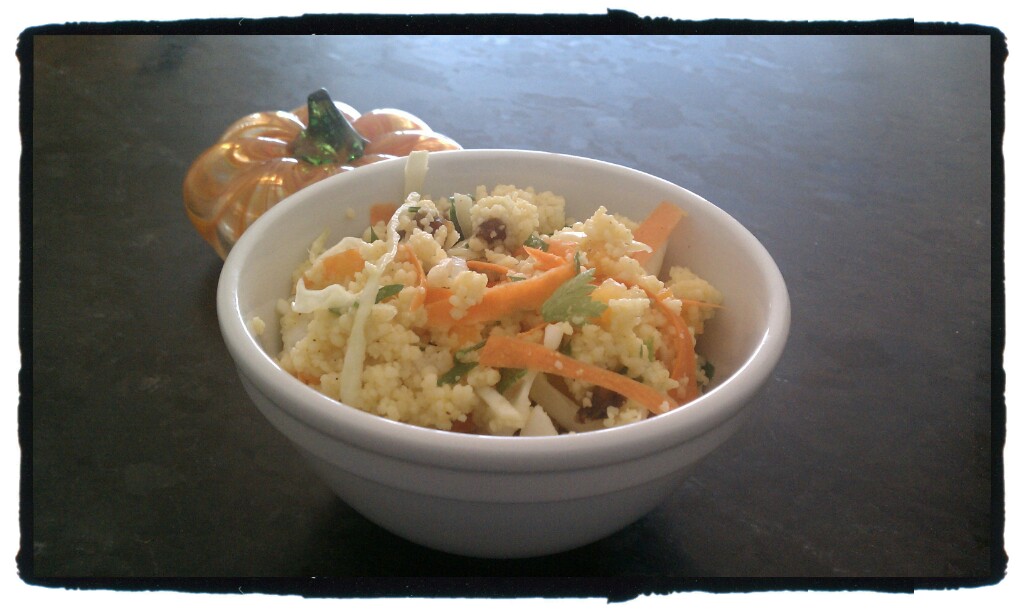
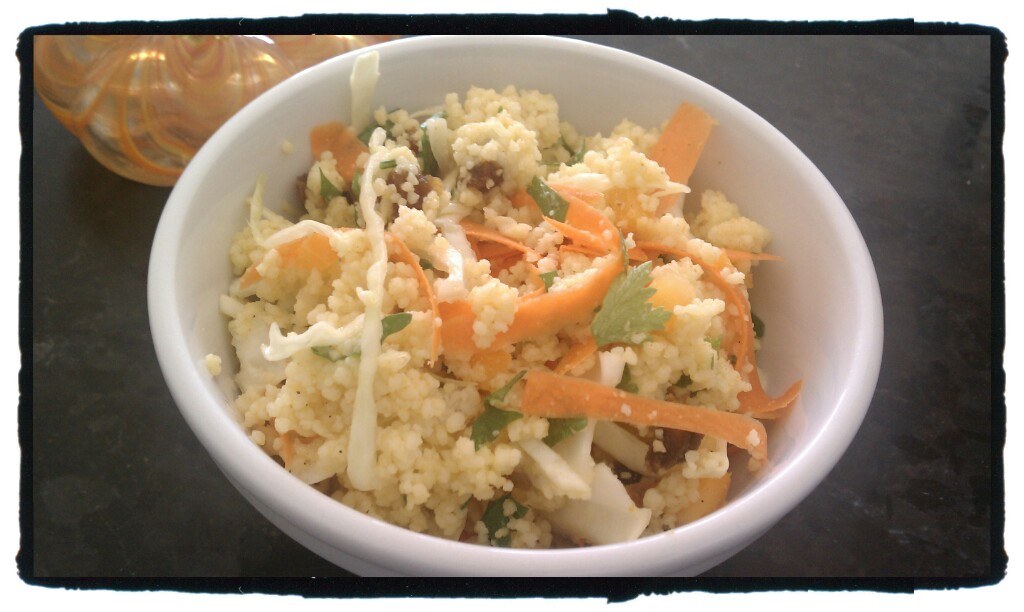
I was in S. Cal for a week and I went to my BFF Monica's one evening and she made this for dinner. I was skeptical because I don't really like couscous. But it was so delicious that as soon as i got home, i had to make some for myself, too, with just a few modifications to suit my tastes better.


Couscous Confetti Salad

Makes about 8 1-cup servings

Couscous is pasta from northern Africa that cooks almost instantly and makes a beautiful and flavorful salad. Whole-wheat couscous is sold in natural food stores and some supermarkets.

1 1/2 cups dry whole-wheat couscous
2 cups boiling water
3 - 4 green onions, finely chopped, including tops
1 red bell pepper, seeded and finely diced
1 carrot, grated
1 - 2 cup finely shredded red cabbage
1/2 cup finely chopped fresh parsley
1/2 cup golden raisins or chopped dried apricots
1 juice of 1 lemon
1/4 cup seasoned rice vinegar
1 tablespoon olive oil
1 teaspoon curry powder
1 1/2 teaspoons salt
In a large bowl, combine couscous and boiling water. Stir to mix, then cover and let stand until all the water has been absorbed, 5 to 10 minutes. Fluff with a fork.

Add green onions, bell pepper, carrot, cabbage, parsley, and raisins or apricots.

In a small bowl mix lemon juice, vinegar, oil, curry powder, and salt. Add to salad and toss to mix. Serve at room temperature or chilled.


My personal changes:
I'm not a big fan of red cabbage, so I used regular cabbage. It's sooo much prettier if you use red.
I don't like raw onions so I omitted.
I used an orange bell pepper because it's what i had. Red would be prettier because the orange blends in with the carrots so it's not as pretty.

yum yum yum...my mouth is watering just thinking of it! Try it, i guarantee you'll love it! You can modify it with any of your favorite raw veggies or leave out out the ones you don't like.

I'm planning on bringing this to my next potluck and I'll use the red cabbage and red bell pepper.

Thanks Mon for the recipe!!